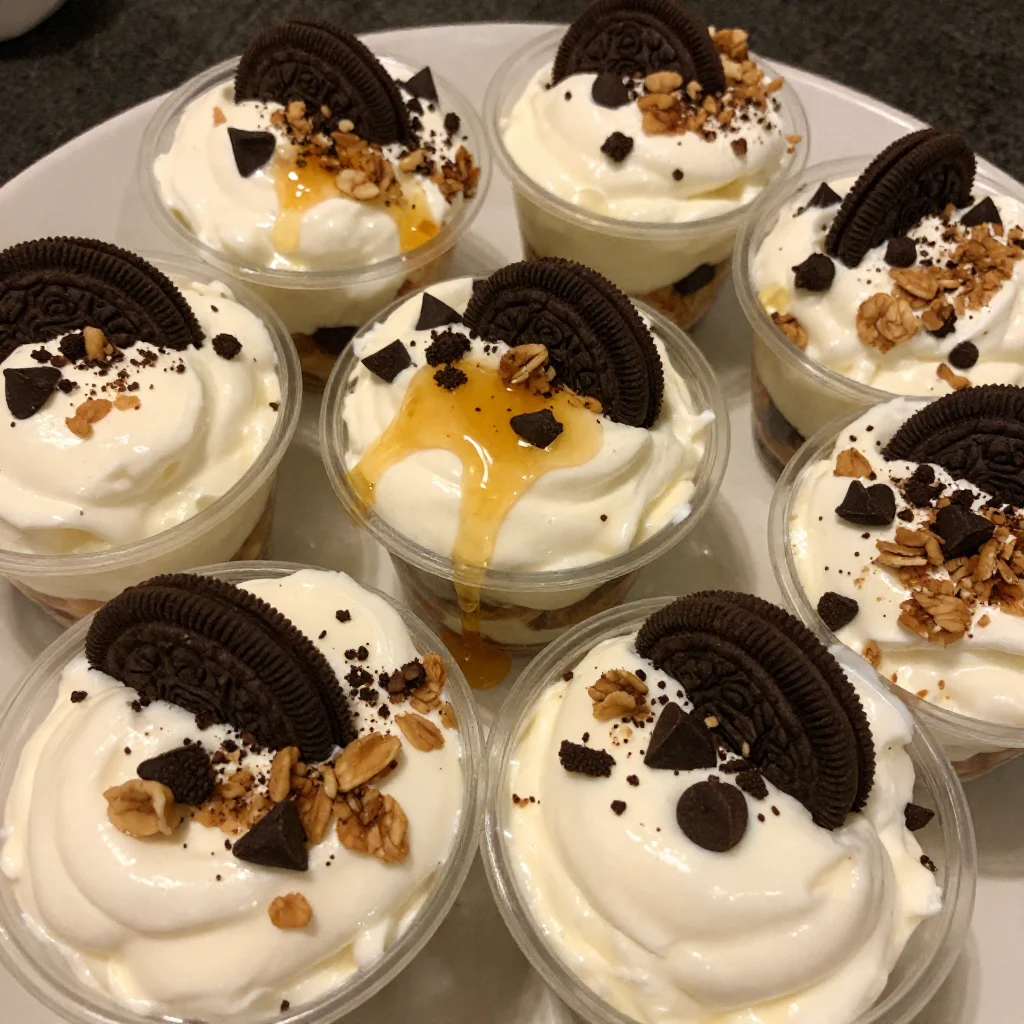
Diy Yocrunch Yogurt Cups
I’ll be honest with you—I’ve been buying those little YoCrunch yogurt cups since I was a kid.
You know the ones: creamy yogurt on one side, crunchy toppings on the other, and that satisfying moment when you dump everything together and stir. But one day, after spending nearly five bucks on a pack of four tiny cups, I thought, “There has to be a better way.” That’s when I started making my own DIY YoCrunch Yogurt Cups at home, and let me tell you, it changed my breakfast game completely.
These homemade versions taste fresher, cost a fraction of the price, and you can customize them however you want. Whether you’re prepping breakfast for the week or packing school lunches, these DIY YoCrunch Yogurt Cups deliver that same nostalgic crunch with way more flavor and control over what goes inside.
Why You’ll Love These DIY YoCrunch Yogurt Cups
First off, these DIY YoCrunch Yogurt Cups are incredibly budget-friendly. You’ll save serious money compared to store-bought versions, especially when you’re feeding a family. Second, you control every ingredient.
Want less sugar? Done. Prefer Greek yogurt over regular?
Easy. Third, the customization options are endless. From cookie crumbles to granola clusters, from chocolate chips to fresh fruit, you can create new flavor combinations every single week.
Fourth, these cups are perfect for meal prep. Make a batch on Sunday, and you’ve got grab-and-go breakfasts or snacks for days. Finally, kids absolutely love these. There’s something magical about having control over when to add the crunchy bits that makes eating yogurt feel like an event rather than a chore.
Ingredients You’ll Need
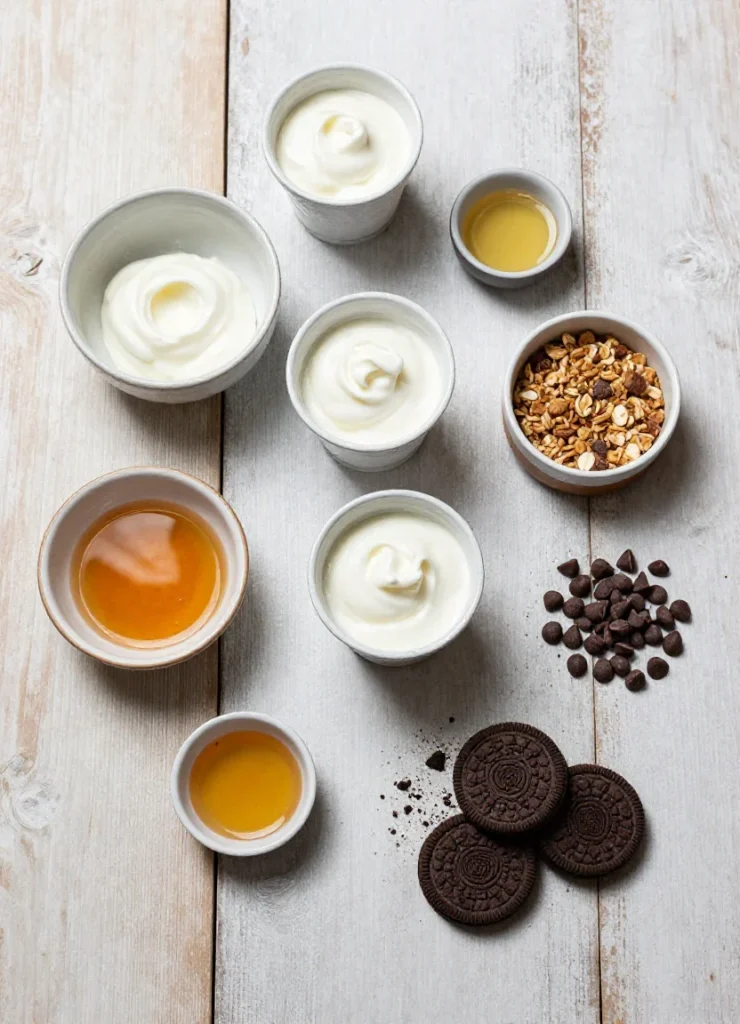
The beauty of DIY YoCrunch Yogurt Cups lies in their simplicity. You need just a few basic components, and you probably have most of them already. Here’s what I use for my go-to version:
| Ingredient | Amount | Notes |
|---|---|---|
| Plain or vanilla yogurt | 4 cups | Greek or regular both work |
| Honey or maple syrup | 2-4 tablespoons | Adjust to taste |
| Vanilla extract | 1 teaspoon | Optional but recommended |
| Granola or cookie crumbles | 1 cup | Your favorite crunchy topping |
| Mini chocolate chips | 1/2 cup | Optional, for chocolate lovers |
| Crushed Oreos | 1/2 cup | Classic YoCrunch flavor |
For my DIY YoCrunch Yogurt Cups, I typically use whole milk Greek yogurt because it provides that thick, creamy texture that holds up well in the fridge. However, regular yogurt works beautifully too. The sweetener is totally adjustable—start with less and add more if needed. Remember, many crunchy toppings already contain sugar, so you might need less than you think.
Substitutions & Variations
One of my favorite things about these DIY YoCrunch Yogurt Cups is how adaptable they are. If you’re dairy-free, coconut yogurt or almond yogurt work wonderfully. Just make sure to choose a thick variety so your cups don’t get watery.
For a protein boost, I often mix in a scoop of vanilla protein powder with the yogurt. It adds creaminess and keeps you fuller longer.
On the topping side, the possibilities are endless. Try crushed graham crackers with mini marshmallows for a s’mores vibe. Use crushed vanilla wafers with sliced bananas for banana pudding-inspired cups.
Chocolate lovers should definitely try brownie bites broken into chunks. For a healthier spin, mix together chopped nuts, unsweetened coconut flakes, and cacao nibs. I’ve even used crushed pretzels with peanut butter chips for a sweet-and-salty version that my brothers went crazy for.
If you want fruit-flavored DIY YoCrunch Yogurt Cups, blend fresh or frozen berries into your yogurt base before portioning. Strawberry, blueberry, and mixed berry all work beautifully. Just remember that adding fruit increases moisture, so you’ll want extra-crunchy toppings to maintain that textural contrast.
Step-by-Step Instructions
Making your own DIY YoCrunch Yogurt Cups takes about fifteen minutes of active time, and most of that is just measuring and mixing. Here’s exactly how I do it:
Step 1: Start by choosing your containers. I use small mason jars or those plastic containers with divided sections specifically made for yogurt and toppings. You can find them online for cheap, and they’re reusable, which I love. If you don’t have those, regular small containers work fine—just use mini containers or small zip-top bags for the crunchy toppings.
Step 2: In a large bowl, mix your yogurt with honey or maple syrup and vanilla extract. Taste as you go. The yogurt should be lightly sweetened but not overly sweet, since your toppings will add more sweetness.
I usually aim for a subtle sweetness that lets the yogurt’s natural tang shine through. Whisk everything together until completely smooth.
Step 3: Portion the yogurt into your containers. I typically make four to six servings depending on the size of my containers. Fill each container about three-quarters full with the sweetened yogurt mixture. This gives you room for toppings and prevents overflow if you’re stacking containers.
Step 4: Now comes the fun part—preparing your crunchy toppings. If you’re using cookies, crush them into bite-sized pieces. Don’t pulverize them into dust; you want chunks that provide real texture.
For granola, break up any large clusters. Mix in chocolate chips, sprinkles, or any other add-ins you’re using.
Step 5: Add your crunchy toppings to the separate compartment of your divided containers, or place them in small bags or containers that you’ll pack alongside your yogurt. I typically use about two to three tablespoons of topping mixture per yogurt cup. This ratio gives you plenty of crunch without overwhelming the yogurt.
Step 6: Seal your DIY YoCrunch Yogurt Cups and refrigerate. They’ll keep for up to five days, though the yogurt is best within three to four days for optimal freshness and texture.
Making your own DIY YoCrunch Yogurt Cups takes about fifteen minutes of active time, and most of that is just measuring and mixing. If you’re looking for a delicious meal to complement your yogurt cups, check out this recipe for Cheesy Taco Pasta.
Pro Tips for Success

After making countless batches of DIY YoCrunch Yogurt Cups, I’ve learned a few tricks that make a real difference. First, always keep your crunchy toppings completely separate from the yogurt until you’re ready to eat. Even a few hours of contact will make cookies and granola soggy, and nobody wants that. This is non-negotiable for maintaining that signature crunch.
Second, if you’re using Greek yogurt and find it too thick, thin it slightly with a splash of milk. The yogurt should be creamy and scoopable, not stiff. On the flip side, if your yogurt seems thin, strain it through cheesecloth for an hour to remove excess liquid. This step makes a huge difference with regular yogurt.
Third, toast your nuts and oats before adding them to your topping mix. Just five minutes in a 350°F oven brings out incredible flavor and creates an even crunchier texture. Let them cool completely before mixing with other toppings.
Fourth, consider the temperature. Your DIY YoCrunch Yogurt Cups taste best when the yogurt is cold but not ice-cold. I usually take mine out of the fridge about five minutes before eating. This slight warming allows the flavors to come forward without sacrificing that refreshing chill.
Finally, label your containers with the date and flavor. When you make multiple varieties of DIY YoCrunch Yogurt Cups, it’s easy to forget which is which. A simple piece of masking tape with a marker does the trick.
Storage & Reheating Tips
Storage for DIY YoCrunch Yogurt Cups is straightforward but important. Keep the yogurt portion refrigerated at all times. It will stay fresh for four to five days when stored in airtight containers.
The yogurt may develop a small amount of liquid on top—this is normal whey separation. Just stir it back in before eating.
Store your crunchy toppings in a cool, dry place if you’re prepping them separately in bags. They’ll stay crispy for at least a week, often longer. If you’re using divided containers that keep everything together, the seal between compartments should prevent moisture transfer, but always check that the seal is intact.
You shouldn’t freeze these DIY YoCrunch Yogurt Cups. Yogurt doesn’t freeze well—it becomes grainy and separates when thawed. If you want to make a large batch, just prepare the sweetened yogurt base and refrigerate it in a large container.
Then portion it out and add toppings as needed throughout the week. This method actually keeps things fresher.
For grab-and-go convenience, I prep five containers every Sunday night. I keep them on the top shelf of my fridge where they’re easy to spot. The toppings live in small containers or bags right next to them, so everything I need is in one place.
What to Serve With This Recipe
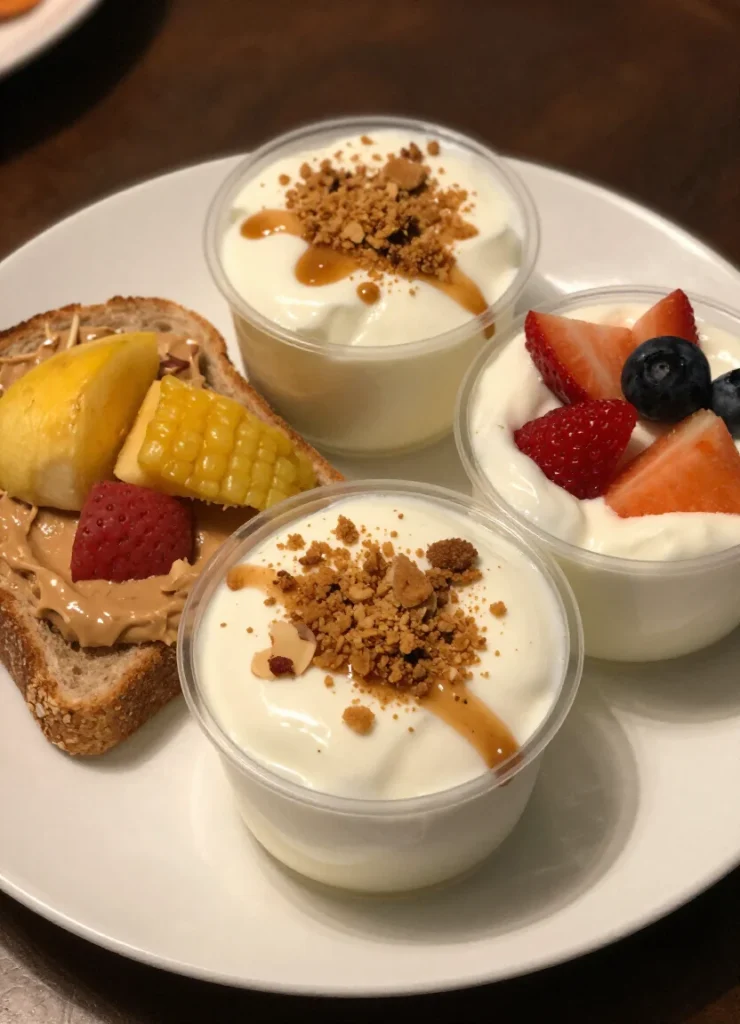
While DIY YoCrunch Yogurt Cups work perfectly as a standalone breakfast or snack, sometimes you want to round out the meal. For a complete breakfast, I pair mine with a piece of whole-grain toast with almond butter or a hard-boiled egg for extra protein. Fresh fruit on the side adds vitamins and more fiber.
These yogurt cups also work wonderfully as part of a brunch spread. Set out several flavors of DIY YoCrunch Yogurt Cups alongside bagels, fresh fruit platters, and coffee. Guests love the interactive element of adding their own toppings. It’s become a favorite at my family brunches.
For kids’ lunches, pack a DIY YoCrunch Yogurt Cup with a sandwich, baby carrots, and a small treat. The yogurt provides calcium and protein, and kids actually look forward to eating it because of the fun crunch factor. I’ve converted several picky eaters this way.
As an afternoon snack, these cups need nothing else. They’re satisfying enough to hold you over until dinner without being too heavy. I often grab one after a workout since the yogurt provides protein and the toppings give me quick energy.
While DIY YoCrunch Yogurt Cups work perfectly as a standalone breakfast or snack, sometimes you want to round out the meal. For a delightful dessert option to serve alongside, try this Brookie Cheesecake Lasagna.
FAQs
How long do DIY YoCrunch Yogurt Cups last in the fridge?
Your DIY YoCrunch Yogurt Cups will stay fresh for four to five days when stored properly in airtight containers in the refrigerator. The key is keeping the crunchy toppings separate from the yogurt until you’re ready to eat. If they’re stored in divided containers, make sure the seal between compartments is tight. The yogurt itself may last up to a week, but for best flavor and texture, I recommend eating them within five days.
Can I use regular yogurt instead of Greek yogurt?
Absolutely! Regular yogurt works perfectly fine for DIY YoCrunch Yogurt Cups. The main difference is texture—regular yogurt is thinner and less protein-dense than Greek yogurt.
If you prefer a thicker consistency, you can strain regular yogurt through cheesecloth for an hour to remove excess liquid. Both types taste delicious, so use whichever you prefer or have on hand.
What are the best toppings for homemade YoCrunch cups?
The best toppings for DIY YoCrunch Yogurt Cups are anything crunchy that you love. Popular options include crushed Oreos, graham crackers, granola, chocolate chips, crushed cookies, brownie pieces, cereal, and chopped nuts. I love mixing textures—try combining something sweet like chocolate chips with something crunchy like granola. The key is keeping toppings completely separate from yogurt until eating time to maintain that essential crunch.
Can I make these yogurt cups dairy-free?
Yes! You can easily make dairy-free DIY YoCrunch Yogurt Cups using coconut yogurt, almond yogurt, cashew yogurt, or oat yogurt. Choose a thick, creamy variety for the best results.
Some plant-based yogurts are thinner than dairy versions, so you may need to add less sweetener or thicken them slightly. The toppings remain the same—just check that any chocolate chips or cookies you use are also dairy-free if that’s important to you.
How do I keep the toppings crunchy?
The secret to keeping toppings crunchy in your DIY YoCrunch Yogurt Cups is simple: separation. Never let the crunchy elements touch the yogurt until you’re ready to eat. Use divided containers, small separate containers, or zip-top bags for the toppings.
Even a few hours of contact with moisture will make cookies and granola soggy. This separation is what makes DIY YoCrunch Yogurt Cups work—you get that perfect textural contrast every single time.
DIY YoCrunch Yogurt Cups are a fun and customizable way to enjoy yogurt, allowing you to mix and match toppings to suit your taste. These yogurt cups can be a healthier alternative to store-bought options, providing a chance to control ingredients and portion sizes, making them a popular choice for meal prep and family breakfasts. Learn more about yogurt and its benefits here.
Nutrition Information (per serving)
| Nutrient | Amount |
|---|---|
| Calories | 280 |
| Protein | 12g |
| Carbohydrates | 38g |
| Fat | 8g |
| Fiber | 2g |
| Sugar | 24g |
| Calcium | 25% DV |
Nutrition information is approximate and based on one serving using Greek yogurt, honey, and granola with chocolate chips. Values will vary depending on your specific ingredients and portions. These DIY YoCrunch Yogurt Cups provide a good balance of protein, carbohydrates, and healthy fats, making them a satisfying breakfast or snack option that keeps you full for hours.
Diy Yocrunch Yogurt Cups
Ingredients
Method
- Choose your containers, such as small mason jars or divided plastic containers.
- In a large bowl, mix yogurt with honey or maple syrup and vanilla extract until smooth.
- Portion the yogurt into containers, filling them about three-quarters full.
- Prepare your crunchy toppings by crushing cookies or breaking up granola.
- Add crunchy toppings to separate compartments or small bags.
- Seal and refrigerate the cups for up to five days.